News:

SMF - Just Installed!

Main Menu
Menu

Show posts

This section allows you to view all posts made by this member. Note that you can only see posts made in areas you currently have access to.

Show posts Menu

Messages - Medeek

#2431

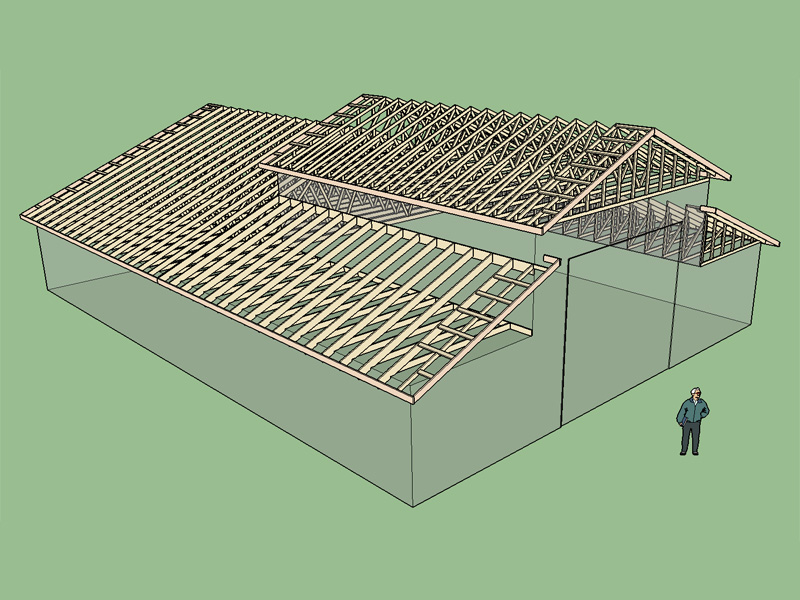
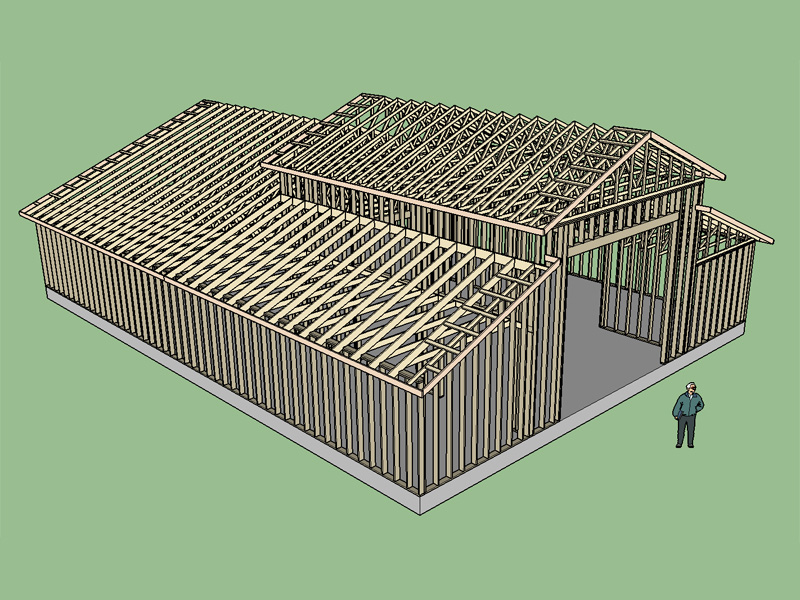
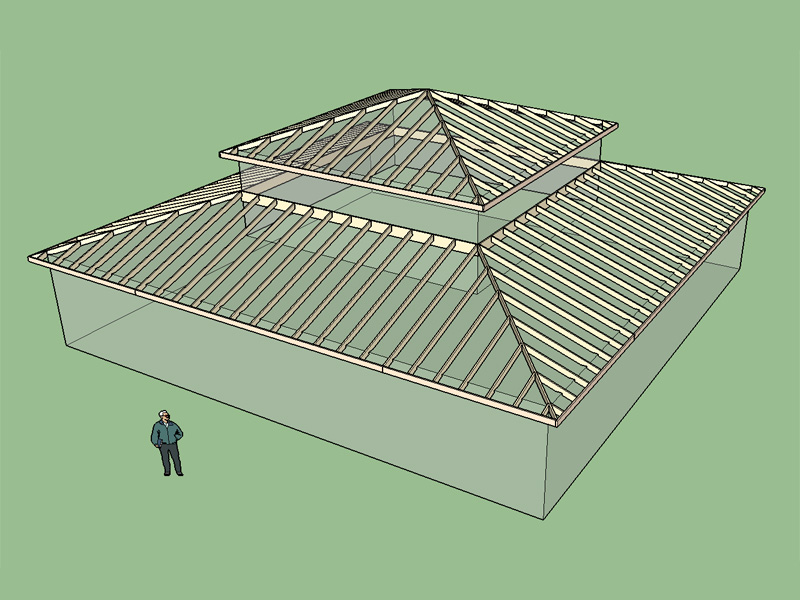
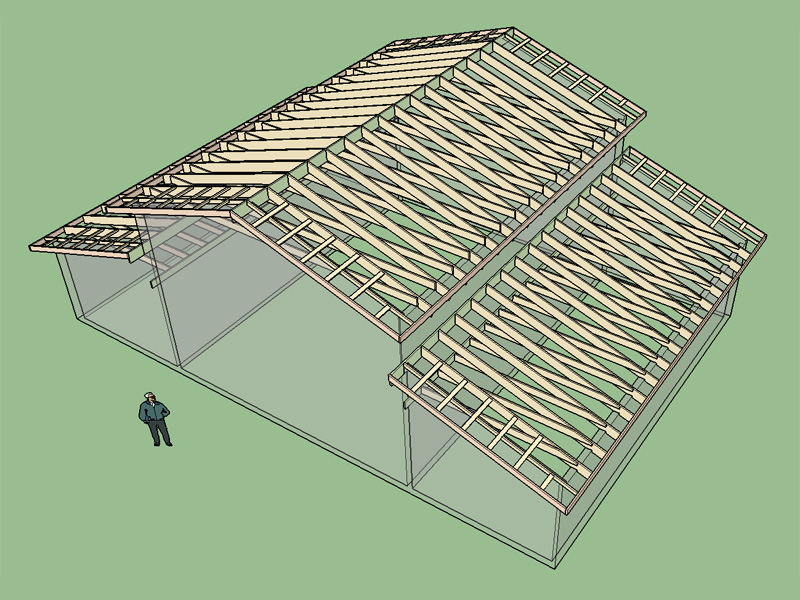
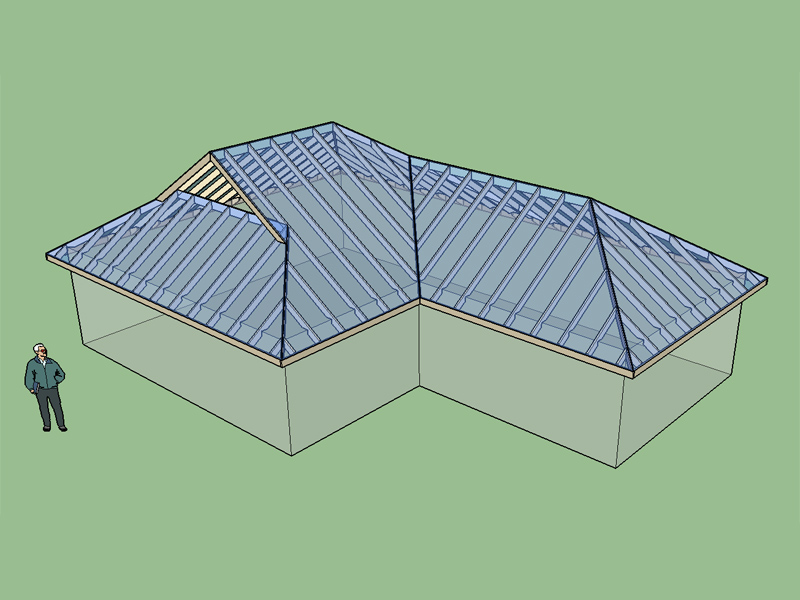
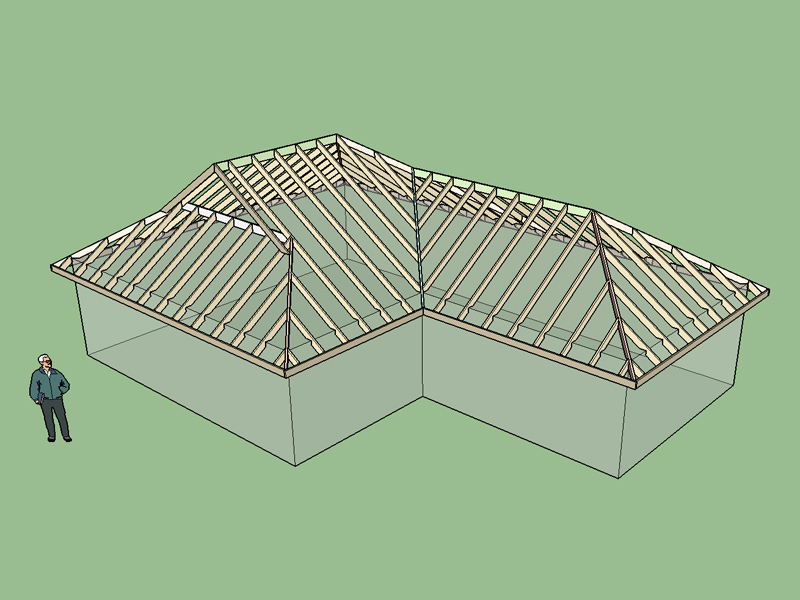
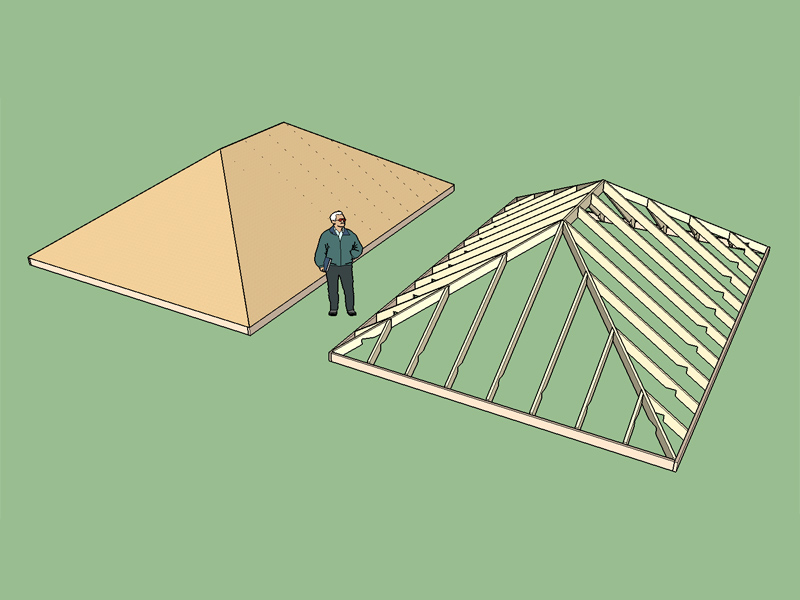
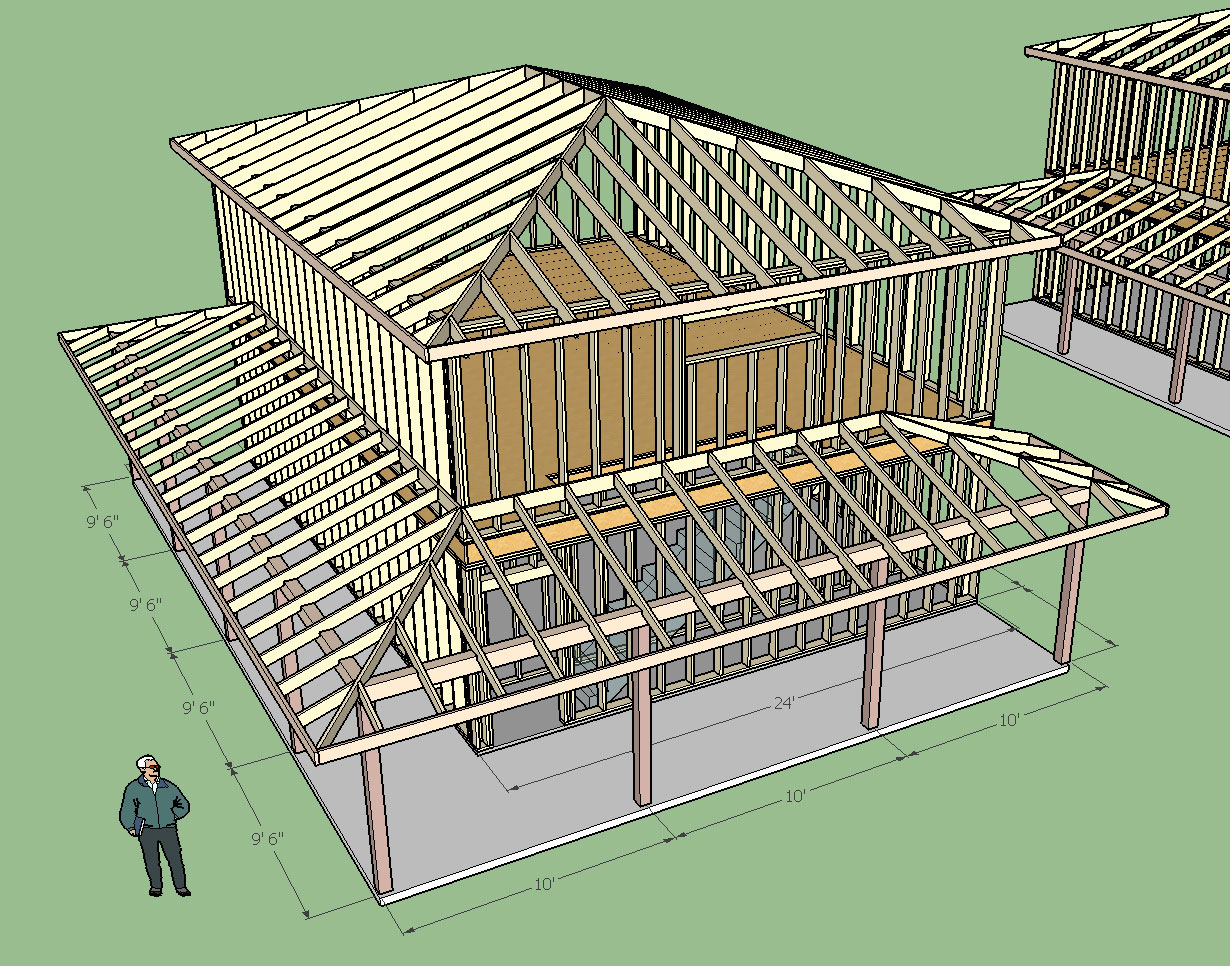
I added the  porch roof using the hip roof and shed roof primitives.  I'm wondering if it might not be worthwhile to add in a feature to create this type of combination roof automatically.  Shed Roof w/ ledger & hip ends.


View updated model here:

https://3dwarehouse.sketchup.com/model.html?id=uf979b67e-2755-4981-9bfc-06d20b64d313

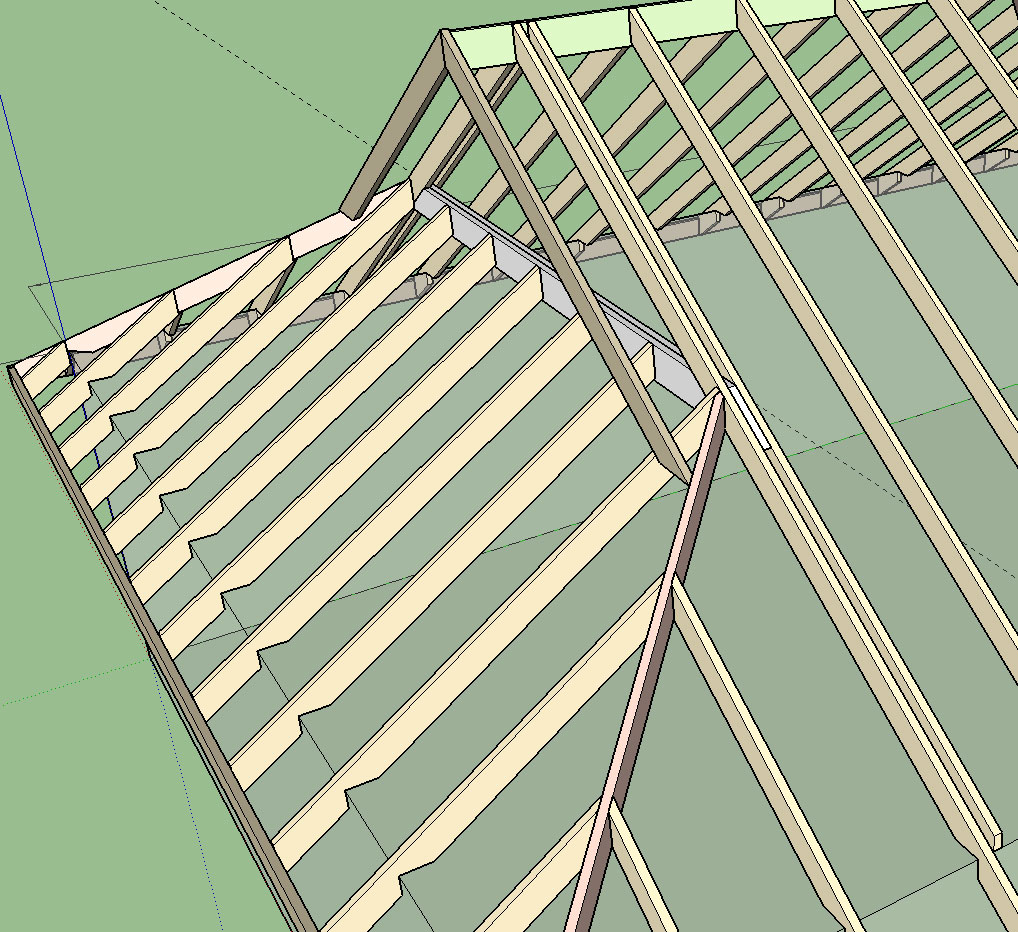
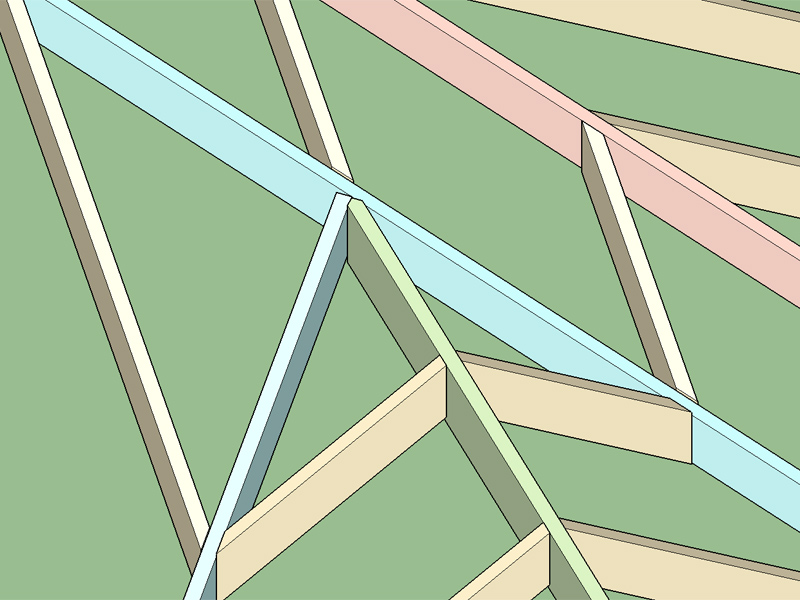
Note, how close the ledger is to the rim joist.  The porch roof diaphragm will actually stiffen up the region of the wall where the stairway is to some extent, in general the use of a "wind beam" is probably advisable if platform framing is used and a quick check of the numbers should be done.
#2432
Testing the real world application of the Medeek Truss Plugin.  This model combines a double fink truss, raised heel fink truss, monopitch truss and shed roof with ledger.  While creating the shed roof special attention to the birdsmouth cut was required to ensure that the fascia height of the rafters and trusses lined up.  Also note the use of the raised heel type truss on the upper roof portion.  Structural outlookers were specified for all gable overhangs. 

5:12 pitch roofs with rafters and trusses 24" o/c.  I did not apply a level cut to the rafter overhangs but that would probably be a given.  Span of the double fink is 48 feet with 2x6 top and bottom chords.


View models here:

https://3dwarehouse.sketchup.com/model.html?id=u98040448-af54-4d79-af30-a3aefca9b941

https://3dwarehouse.sketchup.com/model.html?id=ud8f4c186-1836-4d16-928a-2ba8c10c99a9

If anyone has some real world applications using the plugin that they are willing to share I would be very interested to see how it is being used and it would also give me some direction for further development and improvements.
#2433
More "Fun with Roofs".

This roof was generated by first creating a hip roof primitive then deleting all but 3 components which were then copied and rotated into place for the lower roof hip corner.  The shed roof /w ledger component was created with one primitive and then copied and rotated into place.  Overall a fairly painless process now that I am somewhat familiar with navigating my way around SketchUp.  The fascia required a couple of trims.

The pyramid at the top required no manual intervention. Approximately 10-15 minutes of work for a fairly substantial roof.


View model here:

https://3dwarehouse.sketchup.com/model.html?id=ue55bf7ab-c669-4cd7-8f05-305dee4e2519
#2434
Version 1.2.8 - 02.02.2015
- Added Shed Rafter Roof with Ledger (all advanced options enabled).
- Added ceiling joist option for Shed Rafter Roofs.
- New submenu item and toolbar icon added for secondary (minor) roofs.


View model here:

https://3dwarehouse.sketchup.com/model.html?id=u972818f0-96f0-4f85-9781-087a2db95199

I used this option to create a monitor style roof line but it can also be used for porch roofs, carports etc...  I still need to add a standard shed roof with and upper and lower birdsmouth cut.
#2435

Dutch Gable Rev. 3:

Doubled up gable common rafters with the dutch ridge/ledger is sandwiched between them. Found a paper by Larry Haun, Mar. 1995 "Framing a Dutch Roof" that was published in Fine Homebuilding magazine, that describes a very similar method of framing.


View model here:

https://3dwarehouse.sketchup.com/model.html?id=ude19cd3c-e059-42e0-8e7d-2b0b6b0852a8

Disregard the common rafter sizes they are undersized but look at the method of sandwiching the dutch ridge/ledger between the last common rafters. I would probably also install some blocking between the double gable common rafters. I'm also not showing all of the ceiling joists and bird blocking etc...

If the roof gets large enough then one could go to a double ply dutch ridge, or even a deeper LVL member, assuming there is no internal support available from internal walls.
#2436

Dutch Gable Rev. 2:


https://3dwarehouse.sketchup.com/model.html?id=u32c4c79d-603a-4363-99db-df726b281151


Same as previous except for doubled up common rafters at dutch gable.
#2437

This is my first crack at a dutch gable roof framed with rafters:


Without the sheathing:


Please examine the model here:


https://3dwarehouse.sketchup.com/model.html?id=u060d4827-fbb5-400e-8270-0b244d958750
#2438
The intersection of the supporting valley rafter, valley rafter and lower ridge I had framed incorrectly.  The corrected method is shown below:


Also note that the segment of the supporting valley rafter between the upper ridge and lower ridge would need to be beveled or "backed" otherwise it clashes with the sheathing.  I noticed this when I originally added the supporting valley rafter but confirmed my suspicion when perusing DeWalt's carpentry and framing handbook this morning.  I probably should have pulled this book out before beginning this study but it only confirmed everything I had managed to discover myself once I started examining the model.
#2439
I've uploaded a test L-Shaped structure with a hip roof:

https://3dwarehouse.sketchup.com/model.html?id=u8d384878-941b-4df9-a8c9-8bba849765bb

I've created both hip roof primitives with the plugin, that was the easy part.

I then placed a valley rafter with its centerline (top) inline with both roof planes.  I think I've got it right.  What I am unsure of however, is the best way to terminate the framing at the intersection of the valley, lower ridge and flying hip.  Once I have a handle on how a carpenter would actually construct that junction I think I can proceed to start work on a secondary roof module for both hip and gable rafter roofs.

The secondary roof module will allow one to add secondary roof geometry to a main roof and have it automatically adjust the rafters accordingly.
#2440
Version 1.2.7 - 01.26.2016
- Added advanced roof options for hip rafter roof (sheathing, fascia).


https://3dwarehouse.sketchup.com/model.html?id=u3b08ddf6-b8be-405c-9ae6-912866e7a252
#2441
Some previous notes and images related to WGC trusses:


#2442
For the next week or so I'm going to spend some of my free time on wood gusset plate engineering.  I'm going to post engineering questions and some quasi-engineering questions regarding the connections.  Realize that some of these questions are me thinking out loud, contemplating how best to approach this type of truss design.

I'm looking at the nailing of the gussets right now and I'm considering the difference between nails in single shear or double shear. For larger fasteners (ie. 16d nails) it would seem optimal to clinch them on the reverse side and then calculate them in double shear. My question is at what length of fastener exceeding the total thickness can I functionally clinch the nails and consider them in double shear.

For argument sake lets assume a 1.5" truss ply thickness and 1/2" gusset plates each side giving a total thickness of 2.5". An 8D common nail is 2.5", however I would not consider it in double shear in this application. If I were to use a 10D thru 16D common nail in this situation I would have at least 1/2" of nail or more to clinch so in those cases I think I could safely assume clinching was possible and nails are loaded in double shear. Would less than 1/2" of nail protrusion be too small to clinch?

To open up the calculations to as many options as possible I'm considering 8d, 10d, 12d and 16d nails with all the three possible nail types: common, box, sinker.

I also considering 6d and 7d nails but I'm not sure if I will allows those yet.

The plywood or OSB thickness will be: 3/8, 7/16, 15/32, 19/32, 23/32.

Giving this even more thought it would seem that certain gusset thicknesses and nail combinations would not be optimal if the possibility for clinching and double shear is not possible. For instance if I have 23/32" gusset plates on both sides and 1.5" truss ply for a total thickness of 3". If I were to use a common 10D nail or 12D nail I probably could not clinch and therefore double shear is not possible, hence I would have to nail the truss from both front and back. Would this not tend to cause the main member to have more tendency to split since there are double the nails in it.  It would also require roughly double the nails.

I'm also going to assume that the osb/ plywood is Structural I, this would be my recommendation anyways in an effort to eliminate defects and require a stronger material for the gusset plates.  This affects both the shear values of the gusset plates and the lateral loading capacity of the nails.
#2443
Version 1.2.6 - 01.19.2016
- Added Solid Sawn Floor Joists (metric and imperial)
- Sill plate and Sheathing options (advanced) enabled for TJI and Solid Sawn floor joists.
#2444
Version 1.2.6 - 01.18.2016
- Sill plate option (advanced) enabled for top and bottom bearing floor trusses.


https://3dwarehouse.sketchup.com/model.html?id=u98d5f3e7-8cab-4acc-8160-7e20617e1814

Work on the manual is progressing however for those interested the red colored boards in the image are called  "ribbon boards".  This is fairly typical for floor trusses.  The notch purposely left in the truss to accommodate the ribbon board is called the ribbon cut or ribbon notch.  Continuous ribbons provide stability for installed trusses, and also provide a solid nailing surface for the edge nailing of floor sheathing. This eliminates the need for larger and more expensive “rimboard” solutions required by dimensional lumber and other engineered wood products.  2x4 lumber is common, but any dimension of 2x lumber can be used for the ribbon board.

Similar to the complex hip roofs I need to program the floor truss/TJI module so that it can automatically frame out any non-rectangular floor plan.
#2445
Variation in plate heights, pitches, overhangs and even mixing hip and gable (half hip, dutch gable) further complicate the matter.  To begin with I need a algorithm to generate the roof planes, then the framing just falls out from there.  To create the roof planes I need a fairly robust straight skeleton implementation.