Today and yesterday I'm taking a much needed break from plugin programming to address my new reseller program. I am still fleshing out the way I want this to work but I think it will be a good thing, allowing me to focus on the code while more talented individuals are able to drive the sales end of things.
- Welcome to Medeek Forum.
Resources for Engineers, Architects, Designers, Contractors and Home Owners
This section allows you to view all posts made by this member. Note that you can only see posts made in areas you currently have access to.
#1741
Medeek Wall Plugin / Re: Development and Updates for the Medeek Wall Plugin
August 05, 2018, 01:05:35 PM #1742
Medeek Wall Plugin / Re: Development and Updates for the Medeek Wall Plugin
August 03, 2018, 08:34:36 PM
Version 0.9.0b - 08.03.2018
- Enabled all interior casing styles (Style A, Style B, and Style C) for gothic and arch windows.
- Enabled all interior casing styles (Style A, Style B, and Style C) for gothic and arch windows.
#1743
Medeek Wall Plugin / Re: Development and Updates for the Medeek Wall Plugin
August 03, 2018, 06:31:03 PM
The arch/gothic arch window rabbit hole was very deep:
Ext. Trim and Shutter (Left)
Interior Casing
Interior Casing Options
Adding a new window type now entails the following additional features that must all be considered:
1.) Exterior Trim (Style A, Style B)
2.) Interior Casing/Trim (Style A, Style B, Style C)
3.) Window frame, casing and glass (window geometry will dictate if additional styles can be created for that geometry in addition to the standard fixed window).
4.) Window Grille (ten different grille configurations currently)
5.) Shutters (five different shutter types currently in three different configurations)
Some window types will also involve additional parameters due to asymmetry or other special features.
The trapezoid or triangular window may also involve a pitched header will further complicate matters with wall framing.
#1744
Medeek Wall Plugin / Re: Development and Updates for the Medeek Wall Plugin
August 02, 2018, 03:27:17 AM
Version 0.9.0 - 08.03.2018
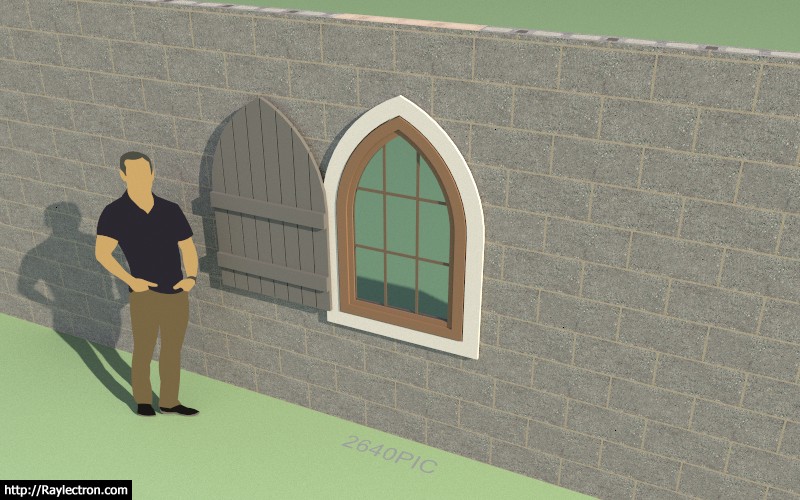
- Added gothic and segmental arched windows to the window draw and edit modules.
- Added shutters: Solid, Flat Panel, Raised Panel, Louver, Board & Batten to arched and gothic arch windows.
View model here:
https://3dwarehouse.sketchup.com/model/717611a9-f02a-477b-863f-4c0fa04e9247/Window-Test-9
- Added gothic and segmental arched windows to the window draw and edit modules.
- Added shutters: Solid, Flat Panel, Raised Panel, Louver, Board & Batten to arched and gothic arch windows.
View model here:
https://3dwarehouse.sketchup.com/model/717611a9-f02a-477b-863f-4c0fa04e9247/Window-Test-9
#1745
Medeek Wall Plugin / Re: Development and Updates for the Medeek Wall Plugin
July 30, 2018, 02:46:27 AM
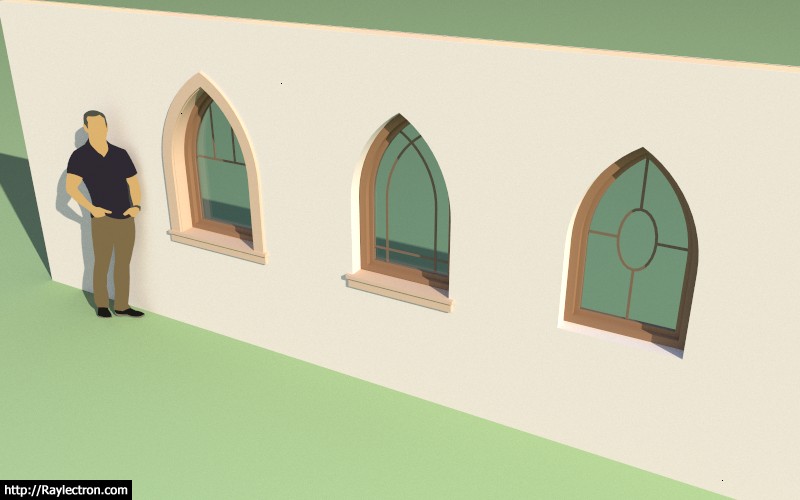
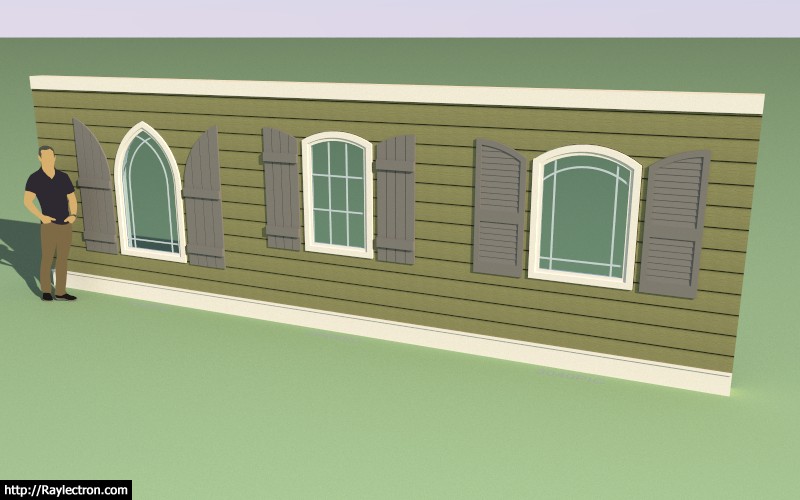
These arched windows and their grilles (Prairie Style shown) were a bit more than I was wanting to bite off when I started into them this morning but perseverance won over in the end and I finally got them sorted out:

The half round springline window is created by setting the radius to half the window opening.
Also note that only the picture or fixed window type is available for the arch and gothic arch geometry.
I still need to work on shutters for these window types but that is a job for another day.
View model here:
https://3dwarehouse.sketchup.com/model/03ca029f-e028-4171-85cd-a336eba4ac10/Window-Test-8
#1746
Medeek Engineering Plugin / Re: Development and Updates for the Medeek Engineering Plugin
July 29, 2018, 02:36:13 PM
I think I am going to try and utilize the Wall and Truss plugins as the jumping off point for the Structural Plugin. I've got to spend some more time fine tuning the shearwall module of the Wall Plugin first then I think we will be ready to try and develop this further.
#1747
Medeek Wall Plugin / Re: Development and Updates for the Medeek Wall Plugin
July 28, 2018, 10:54:06 PM
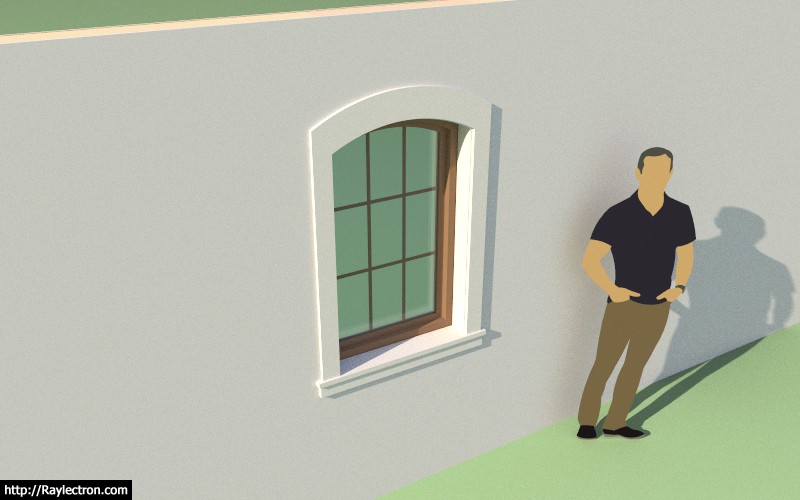
Arched window openings now have exterior trim and wainscoting enabled:
For those interested this is the underlying equations that I'm using to calculate a gothic arch:
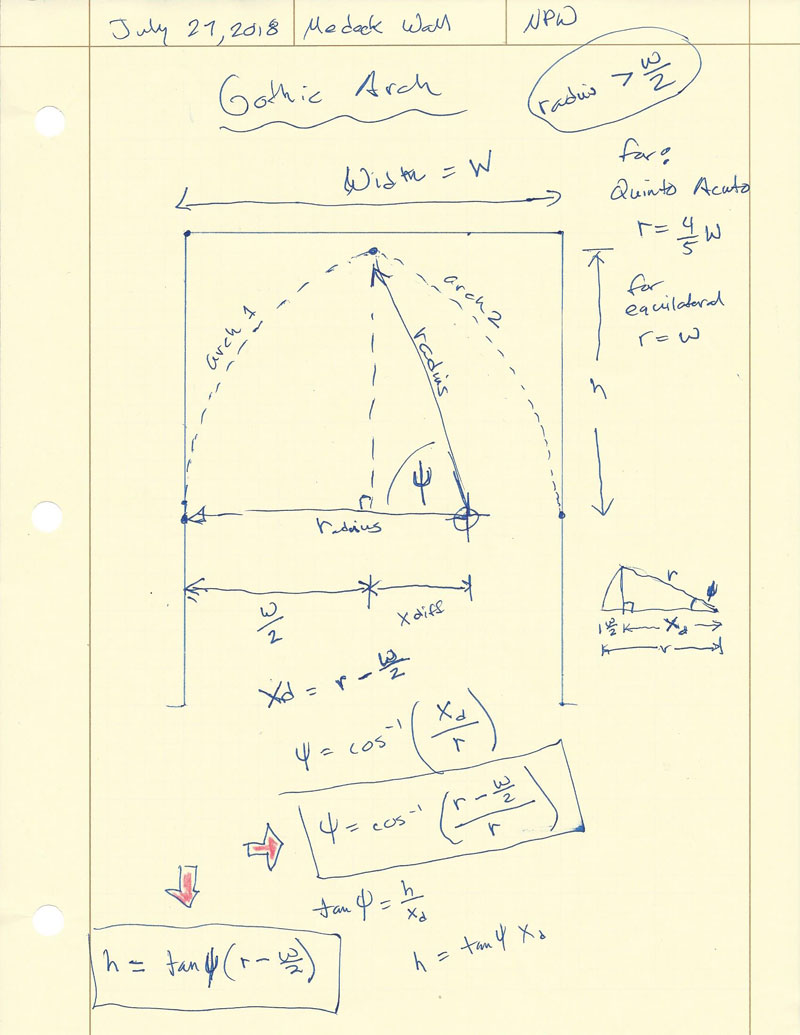
Notice that the center of the arch is at the same height as the springline but the lateral placement of the center of the arch is driven by the radius since the arch is tangent to the vertical . A classic quinto acuto gothic arch has a radius that is 4/5 of the width of the opening, whereas an equilateral arch will be radius = width.
For those interested this is the underlying equations that I'm using to calculate a gothic arch:
Notice that the center of the arch is at the same height as the springline but the lateral placement of the center of the arch is driven by the radius since the arch is tangent to the vertical . A classic quinto acuto gothic arch has a radius that is 4/5 of the width of the opening, whereas an equilateral arch will be radius = width.
#1748
Medeek Wall Plugin / Re: Development and Updates for the Medeek Wall Plugin
July 28, 2018, 01:35:57 AM
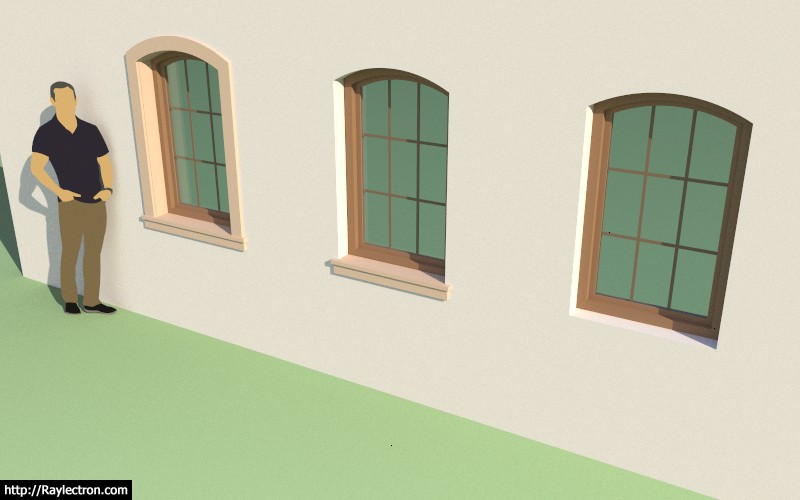
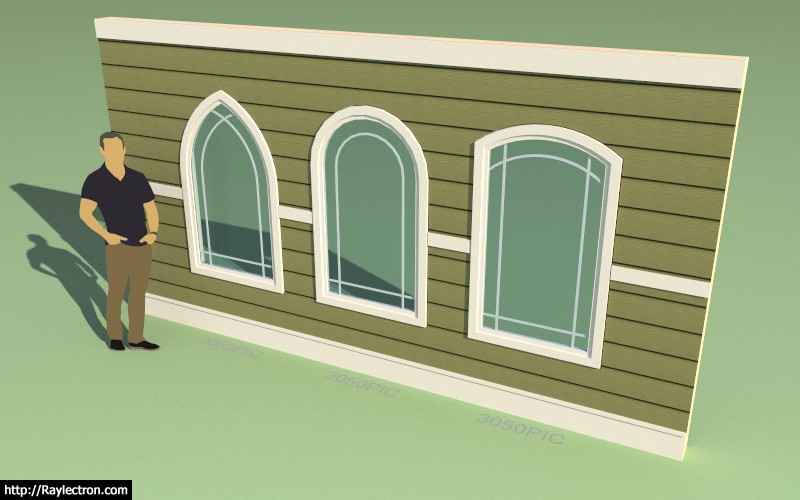
A couple of segmental arches and a quinto acuto and equilateral gothic arch:
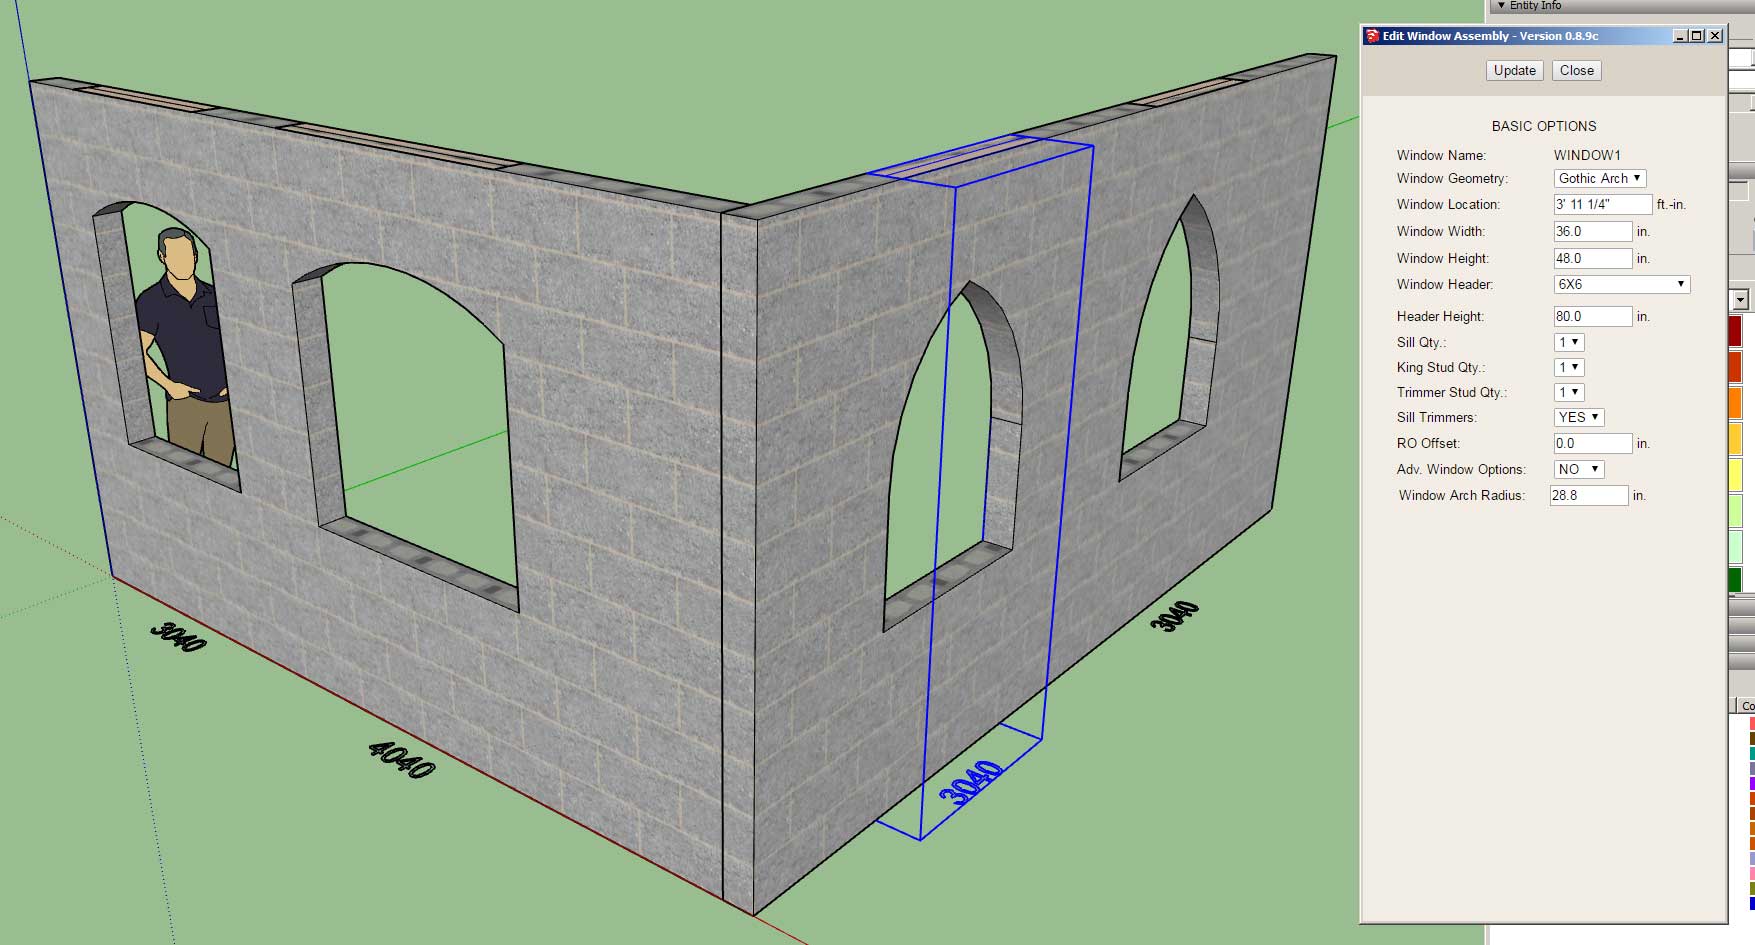
Selecting either an arch or gothic arch geometry will enable the "Window Arch Radius" parameter as shown in the edit window menu above.
Selecting either an arch or gothic arch geometry will enable the "Window Arch Radius" parameter as shown in the edit window menu above.
#1749
Medeek Wall Plugin / Re: Development and Updates for the Medeek Wall Plugin
July 26, 2018, 08:52:48 PM
Version 0.8.9c - 07.26.2018
- Added double, triple and quad casement windows to the window draw and edit modules.
- Resolved a bug in the window and door attribute library modules.
I'm not sure if the callouts are really visible with this image but they are formatted like so:
(3) 2040CSMT (for the 3 lite 6040 window)
This update is per customer request.
View model here:
https://3dwarehouse.sketchup.com/model/05ae80f6-3945-43a7-8c59-a773380f1ce1/Window-Test-7
I've also been thinking quite a bit about integration with other plugins and how I can best facilitate that plugin-to-plugin communication.
My first thought is that the under the hood structure of the wall is actually fully exposed already and can be modified with any other third party plugin. Everything required to build the wall is contained within the attribute library of the wall panel group (outermost container). I will be publishing a specification which delineates each value and position within the attribute library so other plugin authors can easily obtain or set this information as required and have an exact understanding of what each parameter is.
I will also be assembling an API so that another plugin author can cut holes in the walls for openings (windows and doors) and also rebuild the wall panels etc... I'm not exactly sure on all of the details yet but hopefully this will make the plugin more accessible to other plugin authors and allow for better integration.
#1750
Medeek Wall Plugin / Re: Development and Updates for the Medeek Wall Plugin
July 25, 2018, 05:22:19 PM
Version 0.8.9b - 07.25.2018
- Stud/Wall Depth and Width parameters added to the Walls tab of the Global Settings.
For CMU walls you will want to disable the standard stud sizes and then specify the wall/stud width (ie. 7.625") with the Walls tab of the global settings. Also set the framing mode to "CMU" if desired.
When creating the walls one would probably turn off the advanced wall options since gypsum, sheathing, trim and cladding are usually not needed for this wall type but if required all of the options are available for this wall type as well.
One additional note to add is that if you are upgrading the plugin and currently using the layers feature you will want to open up the layers tab of the global settings, so as to reinitialize the layers. I've added an additional layer option for CMU block.
#1751
Medeek Wall Plugin / Re: Development and Updates for the Medeek Wall Plugin
July 25, 2018, 11:16:31 AMQuote from: saakejam on July 25, 2018, 04:51:27 AM
This is terrific work! Can't thank you enough! The addition of CMU and its engineering modules is a huge feature.
Will keep in touch... Thank you again Nathan.
Jim S
I need to add a few parameters into the global settings under the Walls tab to make this feature more accessible and functional, expect 0.8.9b in a short while that we address these issues.
#1752
Medeek Wall Plugin / Re: Development and Updates for the Medeek Wall Plugin
July 25, 2018, 02:14:03 AM
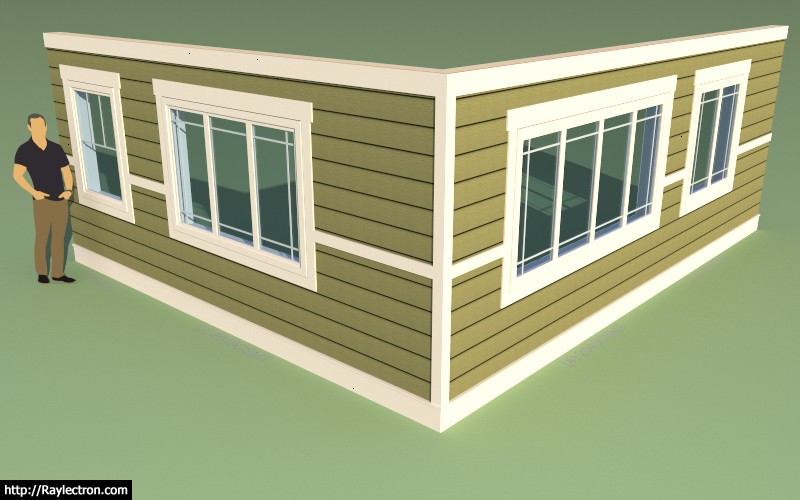
Version 0.8.9 - 07.25.2018
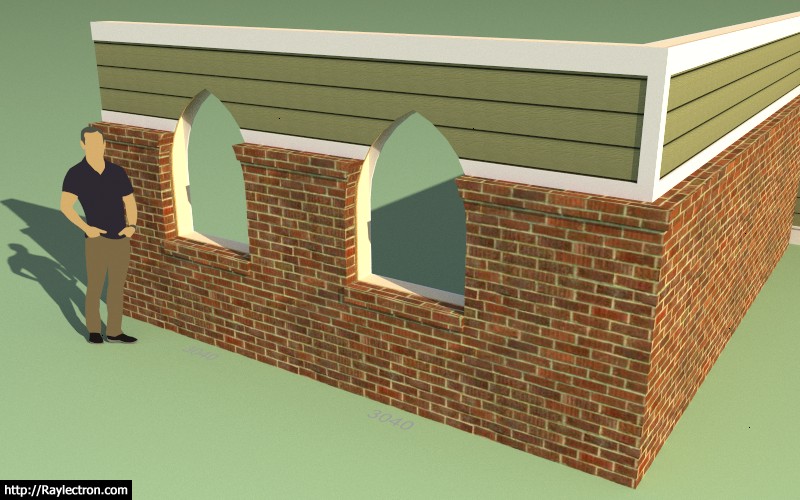
- Added the CMU framing mode for concrete block wall construction.
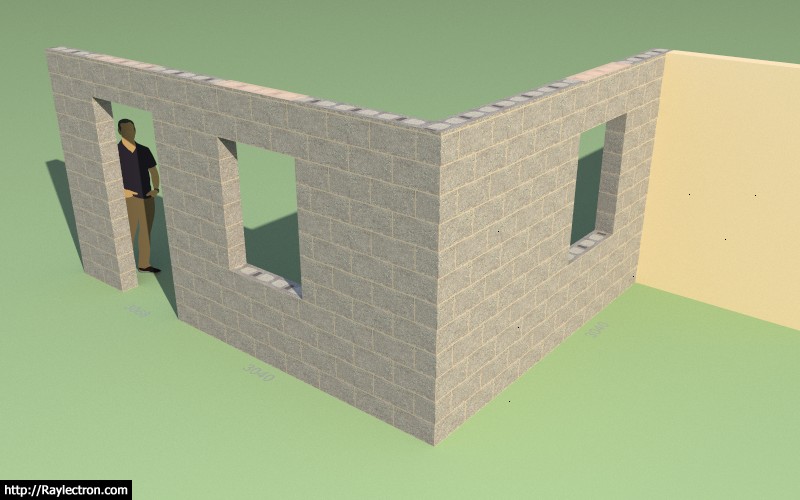
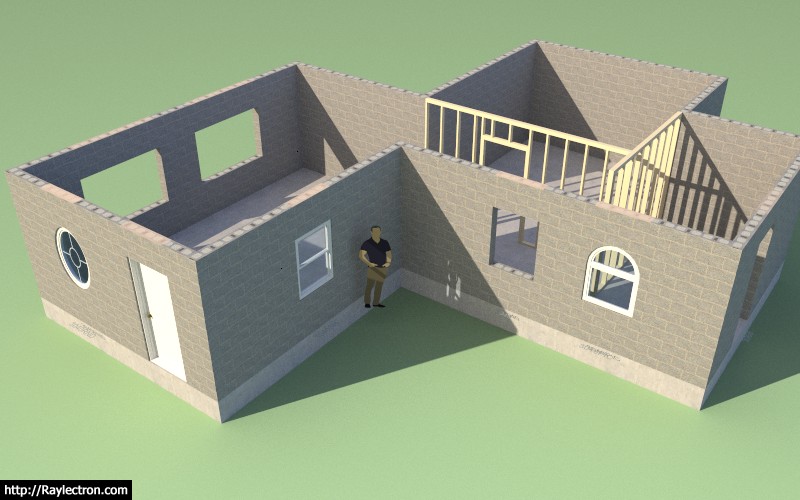
Currently the CMU mode is mostly the same as the "No Framing" mode with a few subtle differences:
1.) Concrete block texture is applied to vertical and horizontal faces of the wall solid to simulate a block wall.
2.) Round openings in the wall are cut out to follow the curve of the window or door.
3.) Description of the group (solid) has CMU in the text. This will be important in later releases as the estimating and engineering modules are developed and implemented.
As I receive further input on this new wall type I'm sure additional features will need to be added to fully bring the CMU wall framing mode up to speed.
View model here:
https://3dwarehouse.sketchup.com/model/439b7b2e-0df4-4f82-97bb-a03494d24dd8/CMU-Test-2
- Added the CMU framing mode for concrete block wall construction.
Currently the CMU mode is mostly the same as the "No Framing" mode with a few subtle differences:
1.) Concrete block texture is applied to vertical and horizontal faces of the wall solid to simulate a block wall.
2.) Round openings in the wall are cut out to follow the curve of the window or door.
3.) Description of the group (solid) has CMU in the text. This will be important in later releases as the estimating and engineering modules are developed and implemented.
As I receive further input on this new wall type I'm sure additional features will need to be added to fully bring the CMU wall framing mode up to speed.
View model here:
https://3dwarehouse.sketchup.com/model/439b7b2e-0df4-4f82-97bb-a03494d24dd8/CMU-Test-2
#1753
Medeek Wall Plugin / Re: Development and Updates for the Medeek Wall Plugin
July 24, 2018, 11:16:54 AMQuote from: saakejam on July 24, 2018, 05:34:27 AM
Nathan.... I need to say you do remarkable work and give so much more!! I don't know what's on your priority list but if I could tickle this
in requesting the concrete block wall addition again I will... Your entire operation is unique and impressive to say the least. I'm enjoying the
your daily forum diary too... My nephew is a Civil engineer just about to achieve his P.E.
Thank you, Jim S
Email me with a few more specifics with regards to CMU walls, any drawings or diagrams would also be useful. For example how do you want lintels handled or modeled. Do you have currently any models I can study etc...
#1754
Medeek Wall Plugin / Re: Development and Updates for the Medeek Wall Plugin
July 24, 2018, 02:04:40 AM
Version 0.8.8 - 07.24.2018
- Added an additional "mode" parameter for exterior wainscoting, which allows for multiple configurations of partial wainscoting.
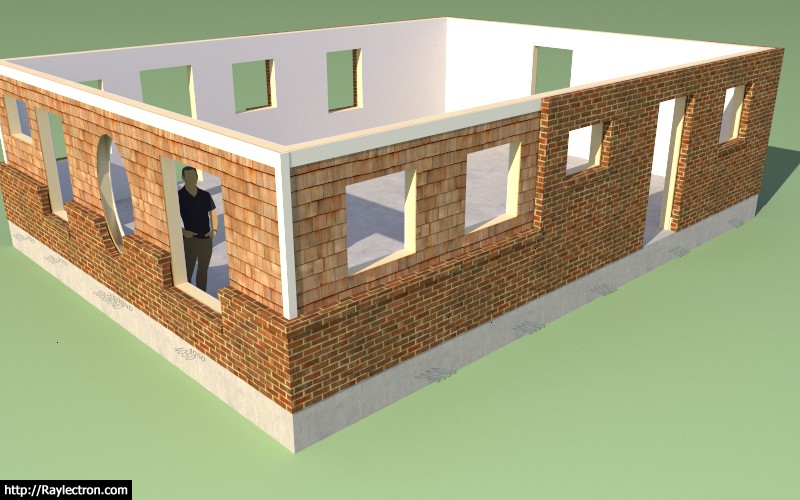
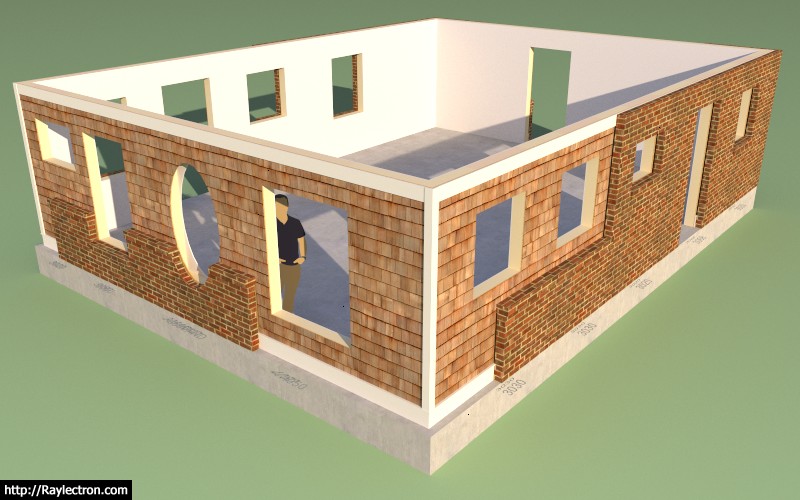
There are now four modes however there are other modes possible but I think I have spent enough time on this for now until further requests propel this to the top of the list again.
View models here:
https://3dwarehouse.sketchup.com/model/e9c2c3c9-2548-421e-92e1-278323d23a6e/Wainscot-Test-2
https://3dwarehouse.sketchup.com/model/9c16d2bb-ca93-4333-b5b9-f0b4e9189369/Wainscot-Test-3
- Added an additional "mode" parameter for exterior wainscoting, which allows for multiple configurations of partial wainscoting.
There are now four modes however there are other modes possible but I think I have spent enough time on this for now until further requests propel this to the top of the list again.
View models here:
https://3dwarehouse.sketchup.com/model/e9c2c3c9-2548-421e-92e1-278323d23a6e/Wainscot-Test-2
https://3dwarehouse.sketchup.com/model/9c16d2bb-ca93-4333-b5b9-f0b4e9189369/Wainscot-Test-3
#1755
Medeek Wall Plugin / Re: Development and Updates for the Medeek Wall Plugin
July 23, 2018, 12:02:55 PM
Ext. Wainscoting is complicated. Currently all I have is Mode 1 in the logic:
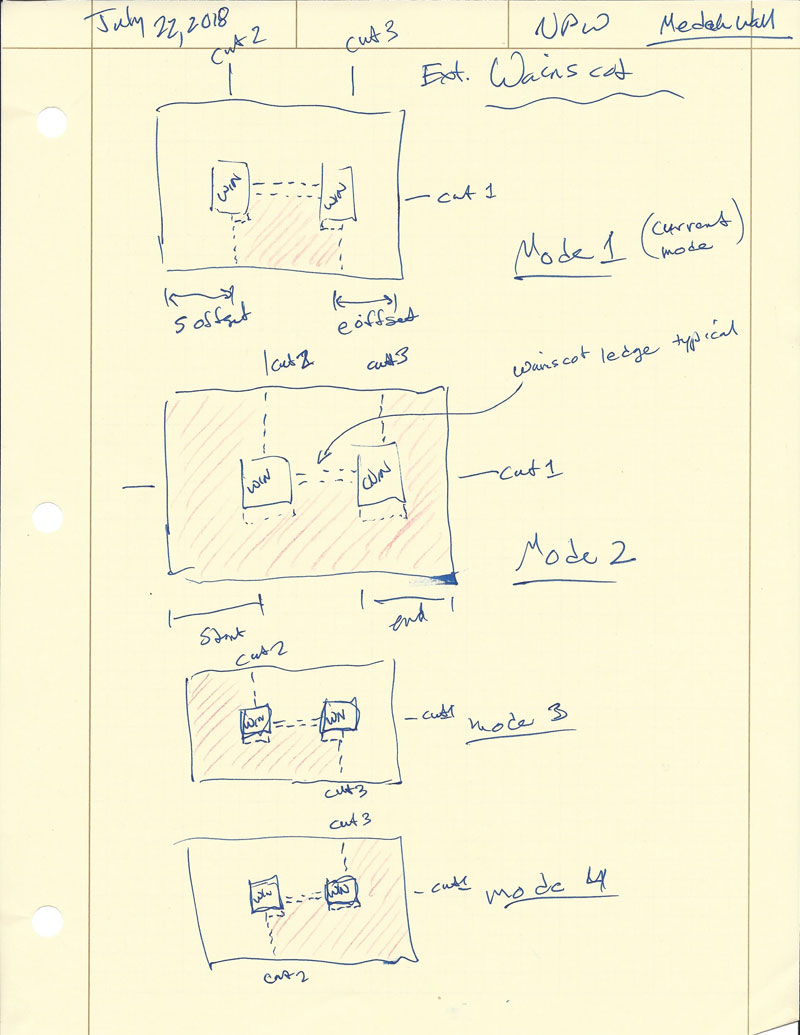
For example in Mode 3 you may start with full height brick then drop down to a half height and then terminate all on one wall panel.
With the start and end offsets set to zero the result for any of the different modes would be exactly the same, they really only come into play when you begin offsetting the wainscoting from the right and/or left.