News:

SMF - Just Installed!

Main Menu
Menu

Show posts

This section allows you to view all posts made by this member. Note that you can only see posts made in areas you currently have access to.

Show posts Menu

Messages - Medeek

#2251
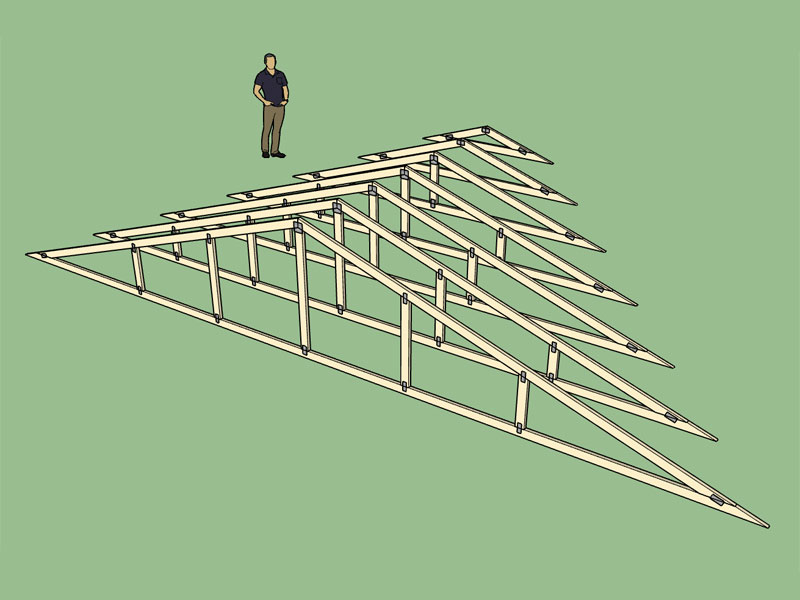
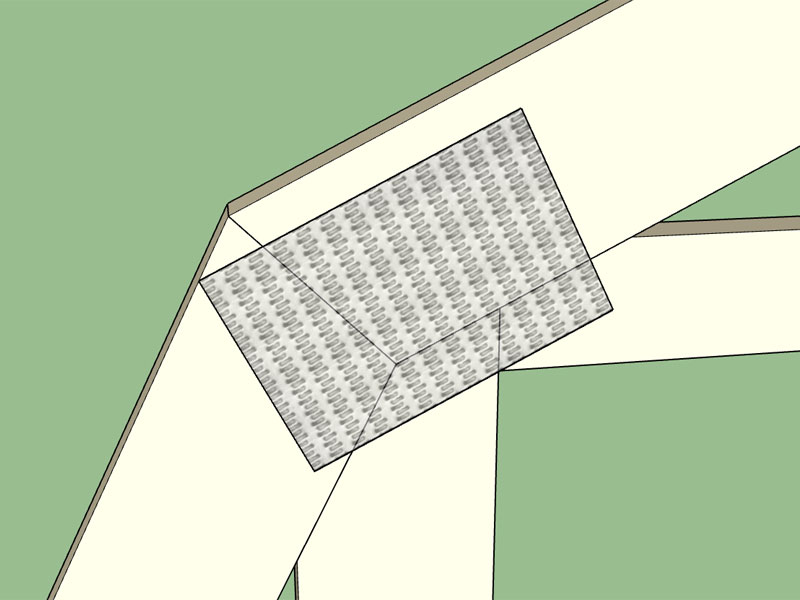
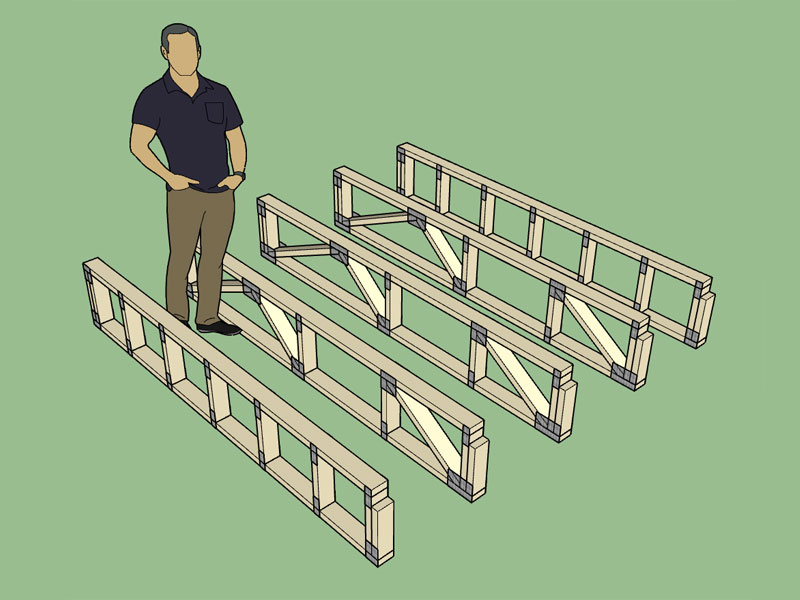
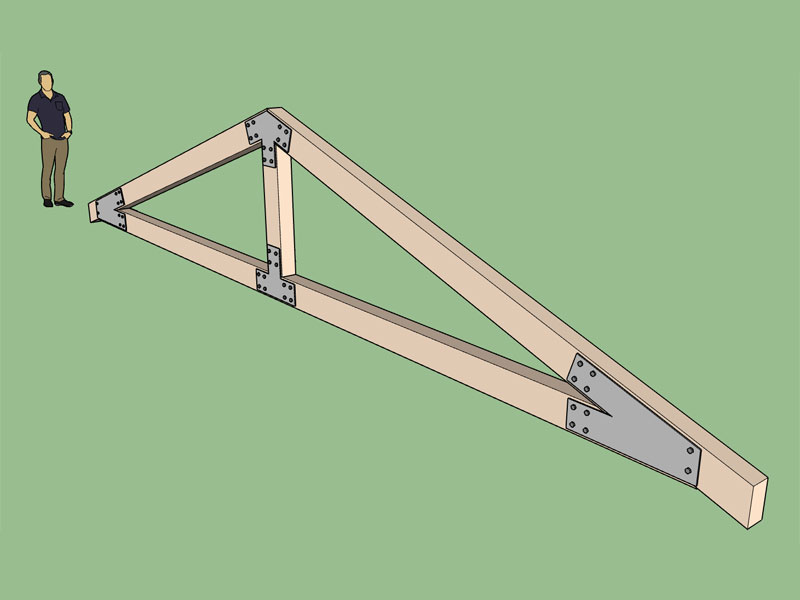
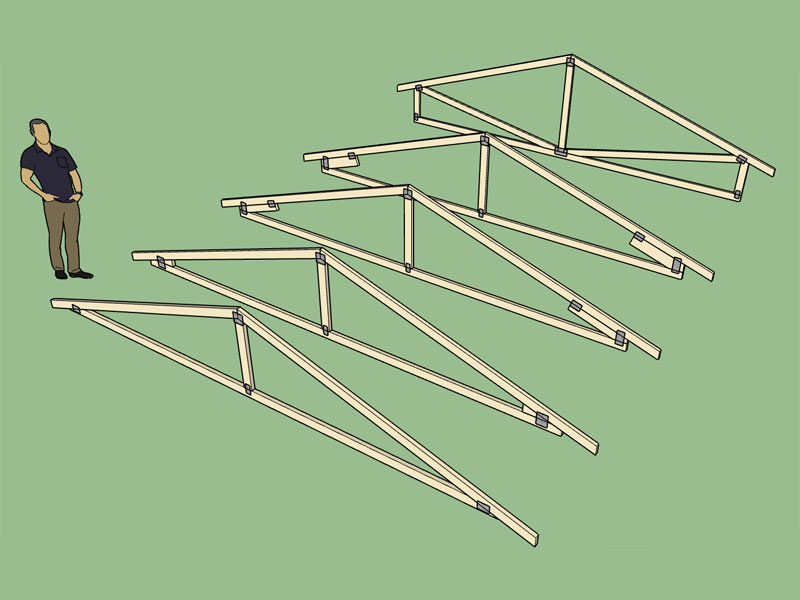
Raised/Energy heels add another level of complexity to the equation.  Below you can see that various heights of a raised heel on a simple King Post truss requires different configurations and hence separate plating routines:


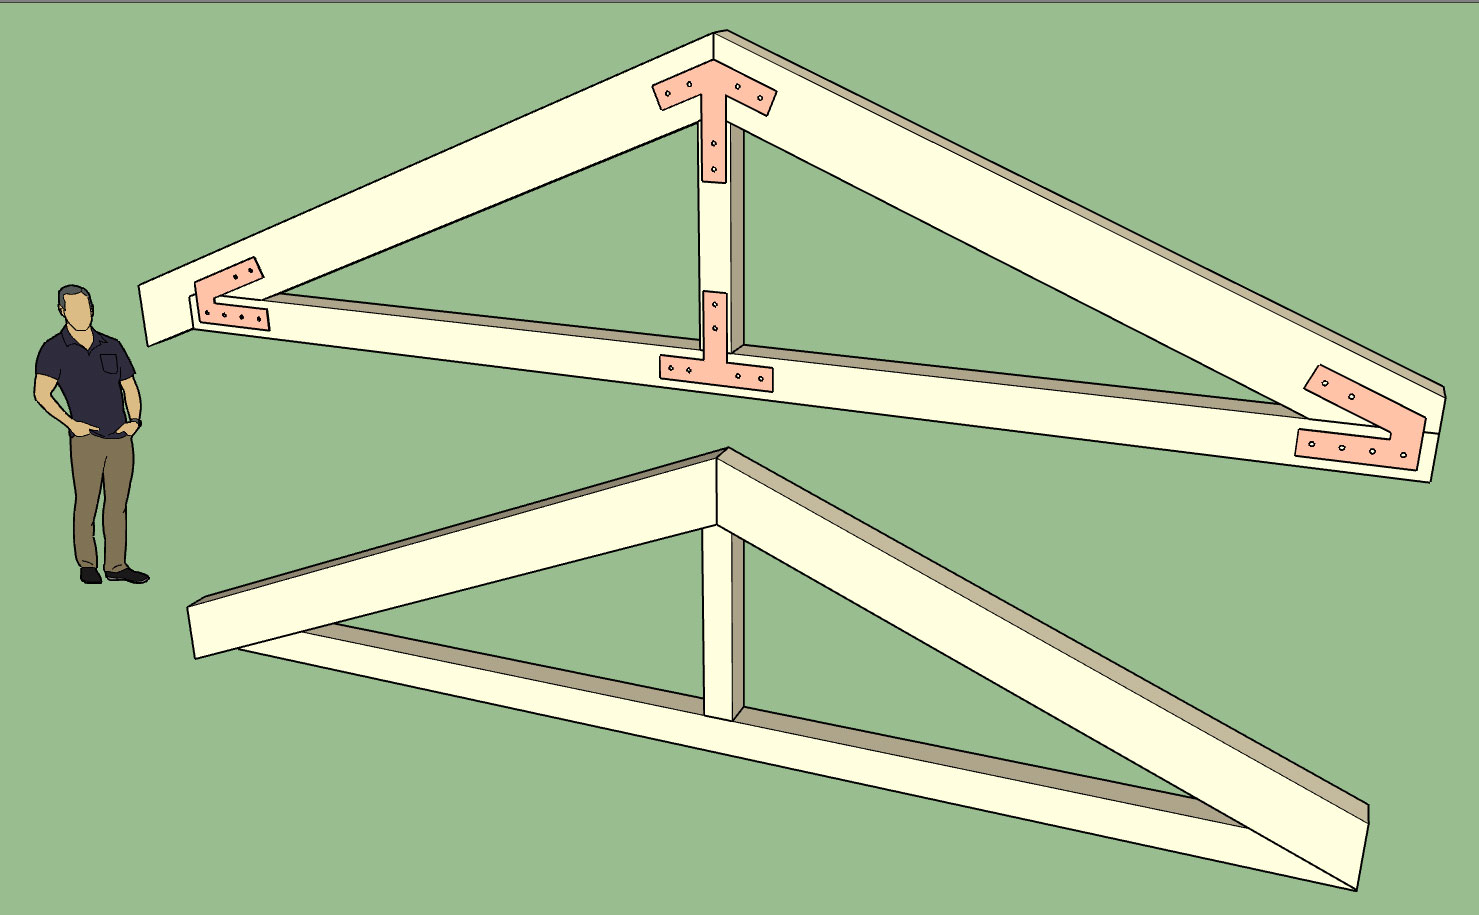
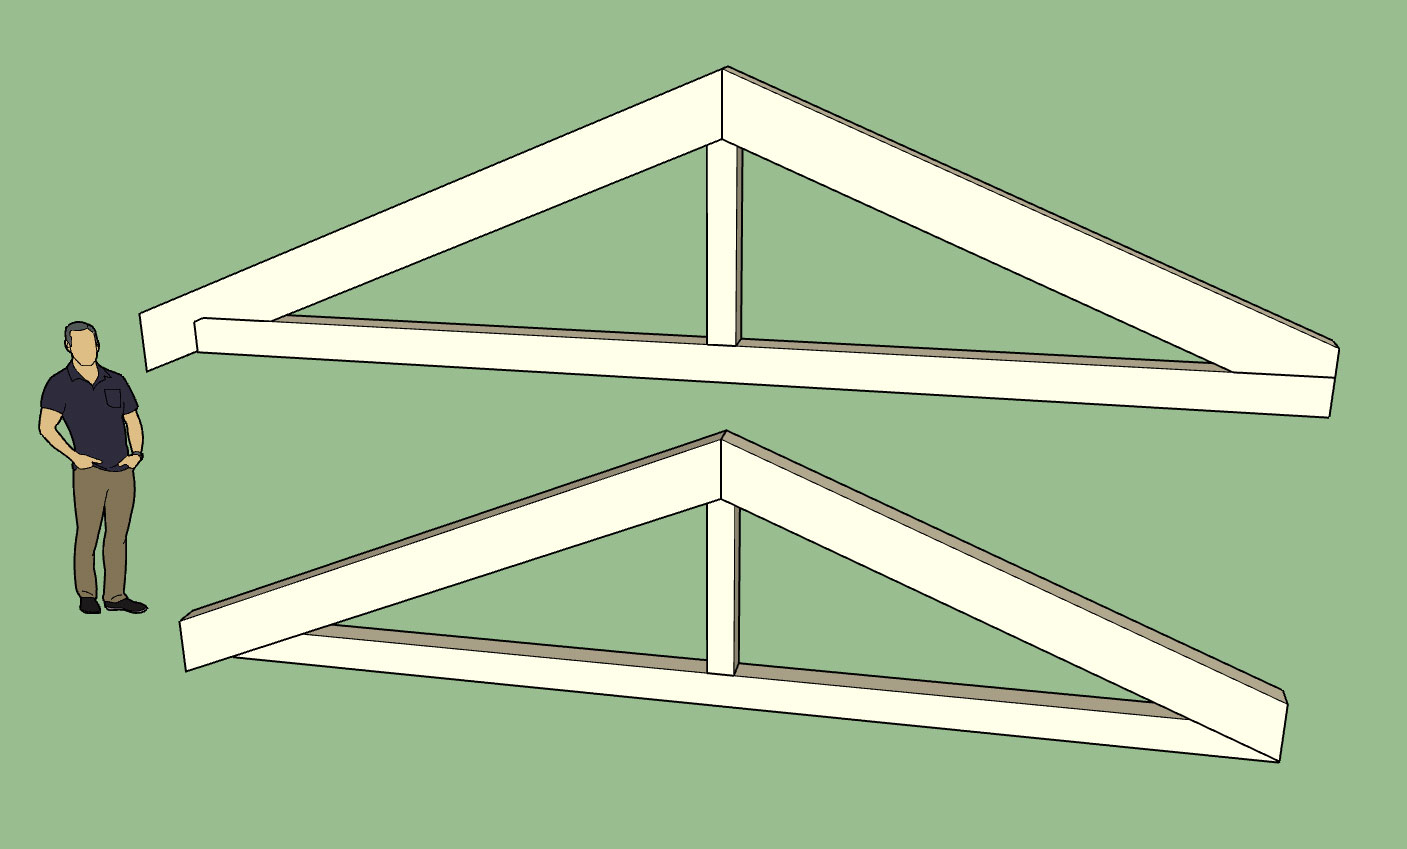
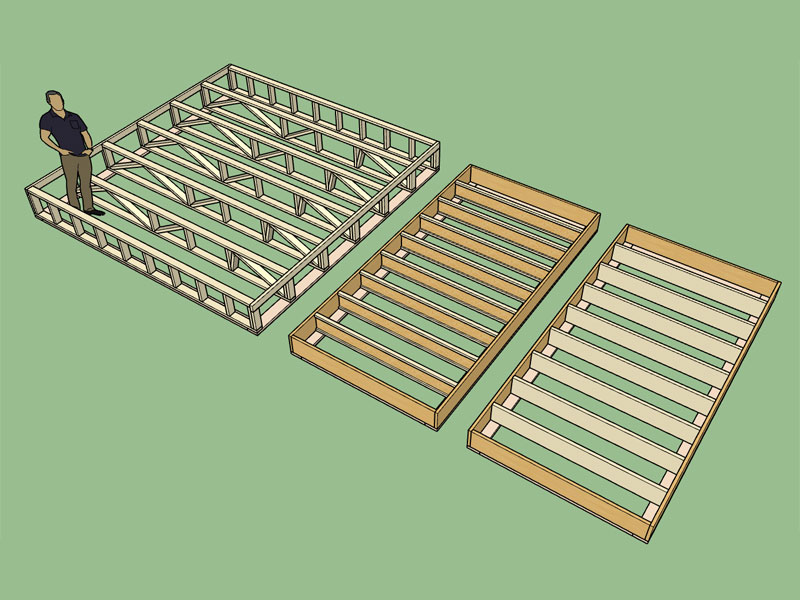
This also affects the gable trusses as well, below is a fink truss with its gable counterpart:


View models here:

https://3dwarehouse.sketchup.com/model.html?id=91d8d78a-8e6c-4dab-9839-4d689c84c297
https://3dwarehouse.sketchup.com/model.html?id=89739563-049f-4277-bfca-75663724967e

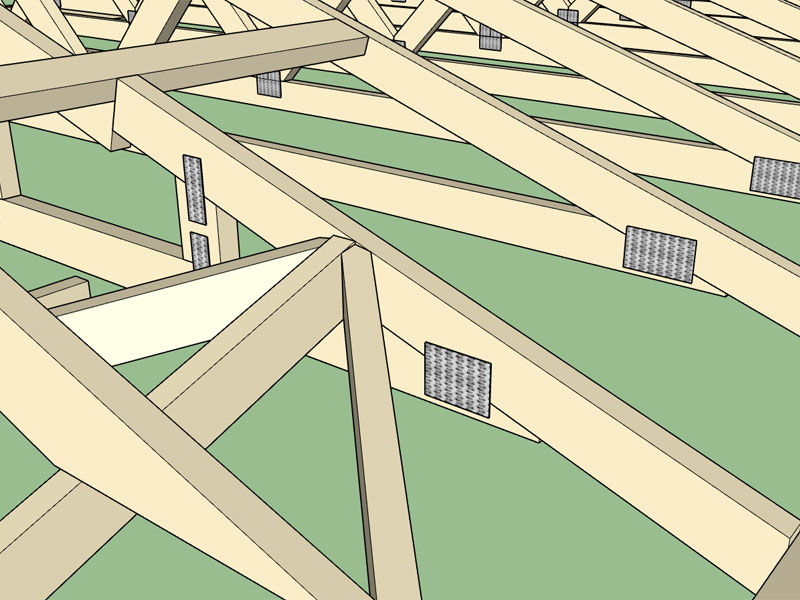
I'm still house cleaning.  I've now got the King Post and Fink truss fully cleaned up with connector plates enabled for all possible configurations (raised heel, non-raised heel, structural, non-structural).  I've only got 10 more common truss types to work through, see list below:

Queen Post
Howe
Fan
Mod Queen
Double Fink
Double Howe
Mod Fan
Triple Fink
Triple Howe
Quad Fink

#2252
Spent some time this morning traversing through the common truss code updating some of the truss types so that I can enable energy/raised heels for all common trusses as well as enable custom layers, materials and connector plates. 

As I've developed the plugin and added new features I used the fink truss as the cutting edge, so everything having to do with this truss type is pretty much up-to-date, however some of the other truss types are seriously lagging so a little house cleaning is in order.

It may be a few days before I can release this latest version since there is a lot of tedious work ahead.
#2253
This is an example of custom layers and materials implemented in the Medeek Truss Plugin and Medeek Foundation Plugin and used in one model:


View model here:

https://3dwarehouse.sketchup.com/model.html?id=5ff9d1dc-7384-4c7f-bc8a-915c2cd3fc6c

Turn off the sheathing layers first to reveal all of the structural framing etc...

Regular walls were created with the Housebuilder plugin.

The trim tool in the Truss Plugin was used quite successfully to manually trim back the dormer roof framing and sheathing.
#2254
Version 1.7.8 - 01.02.2017
- Enabled materials and custom layers for gable dormers.
- Added advanced options for gable dormers, enabled exterior wall sheathing option.


View model here:

https://3dwarehouse.sketchup.com/model.html?id=5b255dad-4823-450d-a7d9-153d983e73a5
#2255
Version 1.7.7 - 12.31.2016
- Enabled materials and custom layers for gable, hip, shed, TJI and dutch gable rafter roofs.

#2256
Version 1.7.6 - 12.26.2016
- Enabled metal plate connectors for monopitch trusses.
- Enabled materials and custom layers for monopitch trusses.


View model here:

https://3dwarehouse.sketchup.com/model.html?id=40819b39-458c-4e87-8a5e-fe16982dfe1d
#2257
Version 1.7.5 - 12.24.2016
- Enabled metal plate connectors for valley truss sets.
- Enabled materials and custom layers for valley truss sets.


Merry Christmas to all.
#2258
This particular joint on a gambrel attic roof I am finding particularly difficult to plate:


Luckily I have a few samples to use as guides.  Given my web configurations at this joint this seems to be the most reasonable method to plate this joint.  Note that the plate  should touch the interior corner and the exterior of the lower top chord but at the same time not project past the lumber into the spaces.  Also the plate is rotated so that it is parallel to the upper top chords pitch.

The algorithm I devised to do this is quite clever I think but can be boiled down to a few concise lines of code:

        # Plate 2 (Gambrel Left)

x2 = @W2x2 - (mpcyy)/(sin(@Phi2))
y2 = @W2y2
m2 = tan(@Phi2)

x1 = @X2
y1 = @Y2
m1 = tan(@Phi1)

x0 = (y2 - y1 - m2*x2 + m1*x1)/(m1 - m2)
y0 = y1 + m1*(x0 - x1)

xoffset = (mpcxx/2.0)*(cos(@Phi2)) + (mpcyy/2.0)*(sin(@Phi2))
yoffset = (mpcxx/2.0)*(sin(@Phi2)) - (mpcyy/2.0)*(cos(@Phi2))

mpcx = x0 + xoffset
mpcy = y0 + yoffset
mpcrot = -@Phi2
MedeekMethods.metal_plate mpcx, mpcy, mpcxx, mpcyy, mpcrot, "PLGL"


# Plate 2 (Gambrel Right)

mpcx = @X5 - mpcx
mpcy = mpcy
mpcrot = @Phi2
MedeekMethods.metal_plate mpcx, mpcy, mpcxx, mpcyy, mpcrot, "PLGR"


This joint has been the most difficult so far, everything else has been cake.
#2259
Plates applied to the top truss:


Specs:

- Truss Type: King Post
- 6x10 TC, 6x8 BC, 6x6 kingpost
- Plate thickness = 0.25"
- single row of bolts with two bolts per row.
- connector plate width = 4.0"
- Bolt Dia. 3/4"
- Bolt Edge Distance (timber) = 4.0"
- Bolt Edge Distance (plate) = 2.0"
- Bolt Spacing = 4.0"
- Bolts and Washers not shown. 

View model here:

https://3dwarehouse.sketchup.com/model.html?id=ed8f688c-a1a2-4c2a-b09a-8ee937060922
#2260
Looking through some old plans I've managed to dig up I came upon a couple of designs by another engineering firm. 

Typically when I've dealt with truss designs I always seen a scarf cut on the bottom chord with the top chord remaining un-notched.  In this other example the bottom chord is kept intact and the top chord is scarf cut or notched, while still allowing a continuous section to extend for the overhang with a depth equal to at least 1/2 the top chord depth.  I think the picture below explains this far better than I can with words:


For MPC trusses I am used to seeing a 1/4" butt cut, however for timber trusses what is more appropriate?

Which method above would go with (arch. and structural reasons)?

View model here:

https://3dwarehouse.sketchup.com/model.html?id=6d3633a4-3b5c-4b9f-9780-23be5230c66d
#2261
- Enabled metal plate connectors for floor trusses.


View model here:

https://3dwarehouse.sketchup.com/model.html?id=ec5402ad-0916-46f7-a84d-1bf7e57ed30f
#2262
Version 1.7.3 - 12.17.2016
- Added a "Materials" tab within the global settings; Auto material assigment (colors and textures) is now an option.
- Enabled materials and custom layers for floor trusses and joists.
- Enabled materials for common trusses: metal plate connectors, lumber, and OSB.


View model here:

https://3dwarehouse.sketchup.com/model.html?id=d9b8fa16-5a7a-43f8-8da5-fc8b913bcba7


A big thanks to those on the SketchUcation and SU board who helped me with the custom materials part of the API, the SketchUp community is a great asset.

By default the metal plate connectors, custom layers and auto materials is turned off in the global settings.
#2263
I like the new addition of the layers, it helps being able to hide certain aspects of the model.  This has led me to think it might be useful to somehow implement materials (colors, textures), either at the layer level or based on the geometry (ie. specific color or texture for the I-joist web -> OSB wood).

#2264
Version 1.7.2 - 12.16.2016
- Enabled custom layers for roof returns, battens and counter battens.
- License renewal enabled in Medeek Account Manager.
#2265
I need to review some of my old files (local residential designs) to get a better idea of timber truss designs but out of curiosity I attempted to manually create a sample timber truss to see how long it took me create one.  About an hour into it I had come up with this:


View model here:

https://3dwarehouse.sketchup.com/model.html?id=355ab1aa-b040-4fca-a5c2-393f49bf71d8


Specifications:

- King Post truss with 4:12 pitch, 12" overhang and 1/4" buttcut, span 28'
- 6x10 Timbers (TC, BC, King Post)
- 3/8" Thick Connector Plates
- 5/8" DIA. Heavy Hex Nuts and Bolts
- 2 Rows of Bolts
- 4.5" between rows of bolts
- 4" bolt spacing between bolts in a row
- Plates offset from timber by 3/4"
- Bolts offset from end of plates by 2"
- Bolts offset from edge of plates by 1.5"
- No washers

This particular connector plate configuration uses two additional bolts at the apex of the heel plates, many other variations are possible.

Please feel free to comment.  This example is just a concept to give me a better idea of the design parameters and issues with this type of truss.